I have made live Instagram followers counter which shows me my current followers and updates every 10 seconds. It’s a DIY so you will need a few electronic items such as a Dot matrix display and node MCU. I will cover everything in detail here so you need not worry about it.
Instagram is an American photo and video sharing social networking service owned by Facebook, created by Kevin Systrom and Mike Krieger and originally launched on iOS in October 2010. More about instgaram at Wikipedia
Now we are going to make the same project below

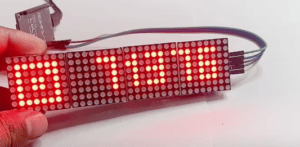
DIY Live instagram followers counter
You will need
Now first of all you have to make the connection of MAX7217 display with Nodemcu esp8266 chip.
SEE THE IMAGES BELOW

Here in ESP8266 module you will find D6, D7, D8, GND AND 3V TERMINALS.
You need to connect all these terminals to MAX7219 DISPLAY TERMINALS. See the image below. All the terminals connection.

You have connect MAX7219 terminals to nodemcu terminals in this way. Vcc will connect to 3v, GND will connect to G, DIN to d8, CS to d7, CLK to d6. After connection plugin the microusb cable to nodemcu and check if display is working or not.
Uploading program on nodemcu esp8266 chip
- First download the instagram file from here.
Instagram master file
After downloading the file you need to extract it into a folder. Then open the Instagram file with Arduino. To do that right-click over it and select open with. Then click on look for another app on pc. Now find the folder where you downloaded Arduino. Now you need to select the Arduino application ( if not understood just watch the video from 00:40, link at the bottom )
2. Now you need to add the ESP8266 board URL. So that it can be detected by Arduino software file. To do that just go to File >> preference and paste the below URL to additional board manager
https://arduino.esp8266.com/stable/package_esp8266com_index.json
- After that click over Tools >> Board >> Board manager
- Search for ESP8266 and install
- Now connect esp8266 to pc via cable
- After that go to tools >> ports
- If not able to select the com port then install USB SER 2.0 drivers, To do that just install the CH341SER exe file onto pc.
- Then you will able to select the prots >> com
3. Now You need to install the libraries
#include <MD_Parola.h>
#include <MD_MAX72xx.h>
#include <SPI.h>
#include "Arduino.h"
#include <ESP8266WiFi.h>
#include <WiFiClientSecure.h>
#include "JsonStreamingParser.h"
#include <ArduinoJson.h>
#include "InstagramStats.h"
#include "theSwedishMaker.h"
To do that click over tools then manage libraries
- Now search for Parola and install MD_Parola library file
- The search for json and install ArduinoJson and JsonStreamingParser
- Then search for arduino and install ArduinoJson
- Also search for MAX72xx and indstall MD_MAX72xx
- Search for Esp8266 and install ESP8266WiFi
You need to install all the libraries and if installed try to compile the it.
If it will show any error for library then it will be missing and you install that library.
If still getting problem watch the full video below
At last change the wifi name and password to your wifi name and password and also change the username to your instagram username text. Then upload the sketch and you will see live instgaram followers. If you have slow internet then it will may be show an error.